-
Showing posts with label Kid's Crafts. Show all posts
Thursday, August 18, 2011
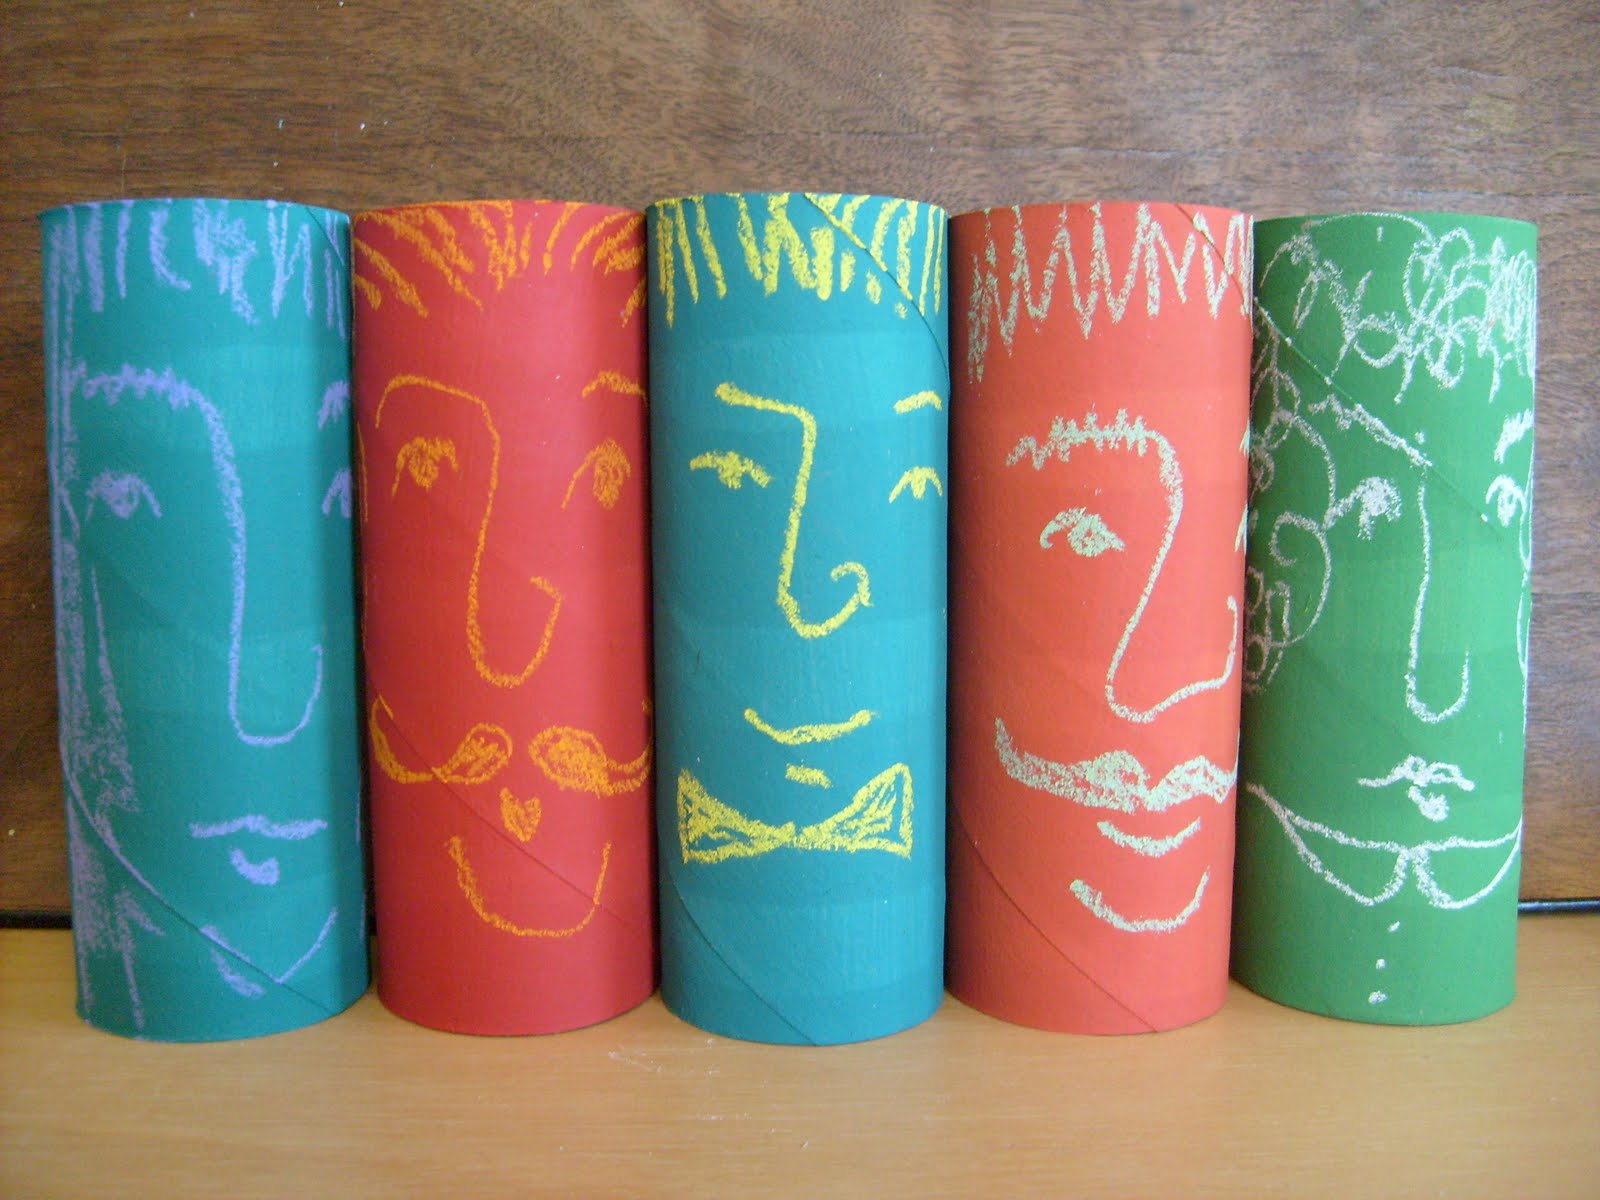
Painted Toilet Paper Tube Chalk Portraits
This is a very simple project you could do with kids (or for yourself). There's not much to it, really. Paint toilet paper tubes with acrylic paint and draw faces on with chalk. If you want to preserve the faces, use a spray fixative, but part of the beauty of this project is that the chalk can be wiped off with a damp cloth and you can draw new faces. If you are doing a project with small children, be sure to use non-toxic paints and chalks and skip the fixative.
Labels:
I made This,
Kid's Crafts,
Paper,
Upcycled Materials
Wednesday, July 6, 2011
Summer Kid Craft: Ric Rac and Button Bracelet
If you sew at all, chances are you have bits of ric rac and odd buttons sticking in your sewing basket that you'd be more than willing to put to good use. This bracelet is a quick and easy project suitable for kids that lends itself to being replicated over and over. Here's how to make a ric rac and button bracelet:
You will need: A needle and thread, 1 inch strip of elastic roughly twice as wide as your ric rac, two strips of ric rac approx. 8 inches long (smaller kid's wrists can use less) and a large button.
Twist the ric rac together so it looks like this.
Sew one end of the ric rac to the strip of elastic. Check to make sure that the bracelet is going to fit. Trim off some ric rac if it seems too big. Sew the other end of the ric rac to the elastic. Sew the button to the middle of the elastic to cover it up.
You will need: A needle and thread, 1 inch strip of elastic roughly twice as wide as your ric rac, two strips of ric rac approx. 8 inches long (smaller kid's wrists can use less) and a large button.
Twist the ric rac together so it looks like this.
Sew one end of the ric rac to the strip of elastic. Check to make sure that the bracelet is going to fit. Trim off some ric rac if it seems too big. Sew the other end of the ric rac to the elastic. Sew the button to the middle of the elastic to cover it up.
Wednesday, May 11, 2011
Paper Monkies
These paper monkies are a design I found in an antique children's art and craft instruction book. I drew out the pattern (which is embedded below), should you wish to make your very own troupe of paper monkies. I printed my monkies directly onto a piece of out-dated map that I cut to 8 1/2" by 11" and ran through the printer. The fold lines are not printed on the pattern, but you can see where to fold the monkies on the original illustration below.
paper monkies
Labels:
I made This,
Kid's Crafts,
Paper,
Tutorials,
Upcycled Materials
Wednesday, May 4, 2011
Paper Donkey
This paper donkey is a design I found in an antique children's art and craft instruction book (you can see the original page below). I drew out the pattern (which is embedded below), should you wish to make your very own paper donkey. I made several prototypes and found that a fairly heavy card stock worked best. Mine is decorated with ink pen and Sharpie markers.
Cut on the solid lines and score/fold on the dashed.
Paper Donkey
Wednesday, April 27, 2011
Paper Rooster
This paper rooster is a design I found in an antique children's art and craft instruction book (you can see the original page below). I drew out the pattern (which is embedded below), should you wish to make your very own paper chicken. I made several prototypes and found that a fairly heavy card stock worked best. Mine is decorated with ink pen and Sharpie markers.
I'm sure any self-respecting 5 year old would be quick to point out that the wattles are supposed to be red. For some reason, when I colored this, I was thinking of it as a hen (although, why I thought a hen would have weird growths hanging off her chin, I haven't the foggiest). Anyway, I'm sure someone out there has their very own resident 5 year old who can correct my lack of barn yard animal literacy.
Cut on the solid lines. Score/fold on the dotted lines.
Paper Chicken
Wednesday, April 20, 2011
Paper Ram
This paper ram is a design I found in an antique children's art and craft instruction book (you can see the original page below). I drew out the pattern (which is embedded below), should you wish to make your very own paper ram. I made several prototypes and found that a fairly heavy card stock worked best. Mine is decorated with ink pen and Sharpie markers.
After I was done with my ram and already had taken it's portrait, I realized that it would have looked more ram-like with the horns folded up (as they were in the original illustration). My animal more closely reassembles a water buffalo, so I guess you have two choices: ram or water buffalo.
Cut on the solid lines. Score/fold on the dotted lines.
paper ram
Tuesday, March 29, 2011
Bunny Rabbit Hand Puppet Tutorial and Pattern
I made this little bunny rabbit hand puppet from scraps of a dip-dyed wool blanket left-over from making the giant mushroom that appeared in the "Forest" issue of Nuno. You can use any medium weight felted or semi-felted wool. This project uses very little fabric, so it's an excellent way for using up small scraps.
#1: Cut out pieces using the pattern embedded below.
#2: Sew on button eyes and felt nose using needle and thread. Chain stitch with lightweight wool yarn to make the bunny's smile.
#3: Create pleats in both ears using needle and matching thread (as shown in the illustrations). Press flat.
#4: Pin ears to the right side of the back piece of the puppet (as shown in illustrations).
#5: Lay front of puppet face down over back/ears. Pin in place.
#6: Machine stitch whole thing together. Be sure to back stitch at beginning and end of seam.
#7: Trim excess from seam allowance.
#8: Turn and press.
Bunny Puppet Pattern
#1: Cut out pieces using the pattern embedded below.
#2: Sew on button eyes and felt nose using needle and thread. Chain stitch with lightweight wool yarn to make the bunny's smile.
#3: Create pleats in both ears using needle and matching thread (as shown in the illustrations). Press flat.
#4: Pin ears to the right side of the back piece of the puppet (as shown in illustrations).
#5: Lay front of puppet face down over back/ears. Pin in place.
#6: Machine stitch whole thing together. Be sure to back stitch at beginning and end of seam.
#7: Trim excess from seam allowance.
#8: Turn and press.
Bunny Puppet Pattern
Friday, October 29, 2010
Last Minute Masks
Bear, Deer and Owl Masks: These masks are all cut from cereal box card and painted with acrylics.
Templates and instructions for all three of these masks are in the fall issue of Nuno Magazine. Purchase from this blog's sidebar.
Bird Masks:
The red bird is cut from cereal box card and painted with acrylics. The "feathers" are cut from a Tyvek mailer. Free pattern and instructions here.
The blue bird is cut from cereal box card, covered with burlap and painted with acrylics. Free pattern and instructions here.
More Mask Ideas from Other People:
Paper Plate Where the Wild Things Are Mask
Cereal Box and Tissue Paper Bird Mask
Cardboard and Egg Carton Bunny and Pig Masks
Venetian Carnival Style Mask made from Recycled Jeans
Last Minute Owl Costume with Little Cardboard Mask That Attaches Directly to Sunglasses
(This costume could also double as a Wild Thing when combined with paper plate mask I linked to above.)
Friday, October 15, 2010
Tutorial: Simple Half Knot Macrame Bracelet
I made this macrame bracelet using a ordinary jute twine (available at any hardware store) which I dyed dark blue and gray. This bracelet uses only one knot and takes very little time to create, making it a suitable project to do with kids. For a more delicate look, use a thinner cord or yarn instead of jute.
Note on dying: Jute appears to take dye very well. I used Rite dye. I would suggest cutting it to length (a bit longer than you need, because the ends will fray) before attempting to dye it. I tied my bundles of twine together too tightly when I did the gray, you can see sections where the dye didn't take.
You will need:
Two 2 foot (60cm) lengths of jute for filler cords (dark blue in example).
One 7 foot (2.5m) length of jute for knotting cords (gray in example).
Large bead.
Clip board or other method of securing piece as you work.
To begin, at the halfway mark of both filler cords create a loop a suitable size to fit your bead.
Slip loops under clip of clipboard
At the halfway mark of your knotting cord, knot around filler cords as shown. Pull very tight and slid up tightly against clip.
If you remove the cords from the clip if should look this.
Begin your series of half knots. They are made as shown. This is the only knot you will use for the bracelet. As you repeat these knots the bracelet will begin to twist. This is what is supposed to happen. When knotting becomes awkward, remove bracelet from clip and turn it over. If you get confused, remember that you always begin the knot with the left cord.
At the very end of the bracelet, I switched colors by moving the two light gray cords to the middle to function as filler cords and taking two of the filler cords and using them as knotting cords. This is not necessary, but does add a little visual interest.
When you reach the desired length for your bracelet, cut off the filler cords flush with the end of the bracelet and thread the two knotting cords through the bead. Secure the bead by knotting the cords very tightly together and clip off the excess cord (or fluff out for a tassely effect).
Subscribe to:
Posts (Atom)


