Showing posts with label Thrift Decorating. Show all posts

Thursday, January 6, 2011

Tutorial: Himmeli from Paper Straws


I got inspired to try making Himmeli by Elsie Marley's simple version and the more complex creations seen in Jeana Sohn's closet visit with Momo Suzuki.

What exactly are Himmeli? They are Finnish mobiles (for the lack of a better descriptor) traditionally made of rye straw and hung over the table to insure a good (rye) harvest. Since I'm not expecting any rye harvest (good or otherwise) I decided to try using a more plentiful waste product, magazine pages. 

Some nice examples of tradition Himmeli can be seen here, here, and here.

Basic Paper Straw How-To:

Lay the sheet with the side you want to be showing face down. 


 Begin rolling very tightly from the lower left corner. 

 
When you near the mid-point. Smear stick glue from the right corner to the left corner. Continue rolling up.

Once you have rolled up the page past the right and left corners, smear on more stick glue as you were tracing all the way around the edge.


Continue rolling up. Add a final extra smear of glue to the top corner just as you finish rolling.

Allow to dry completely before cutting into smaller sections. Clipping in optional and make sure you don't clip so tightly that you are left with a flattened out section when you take the clip off.
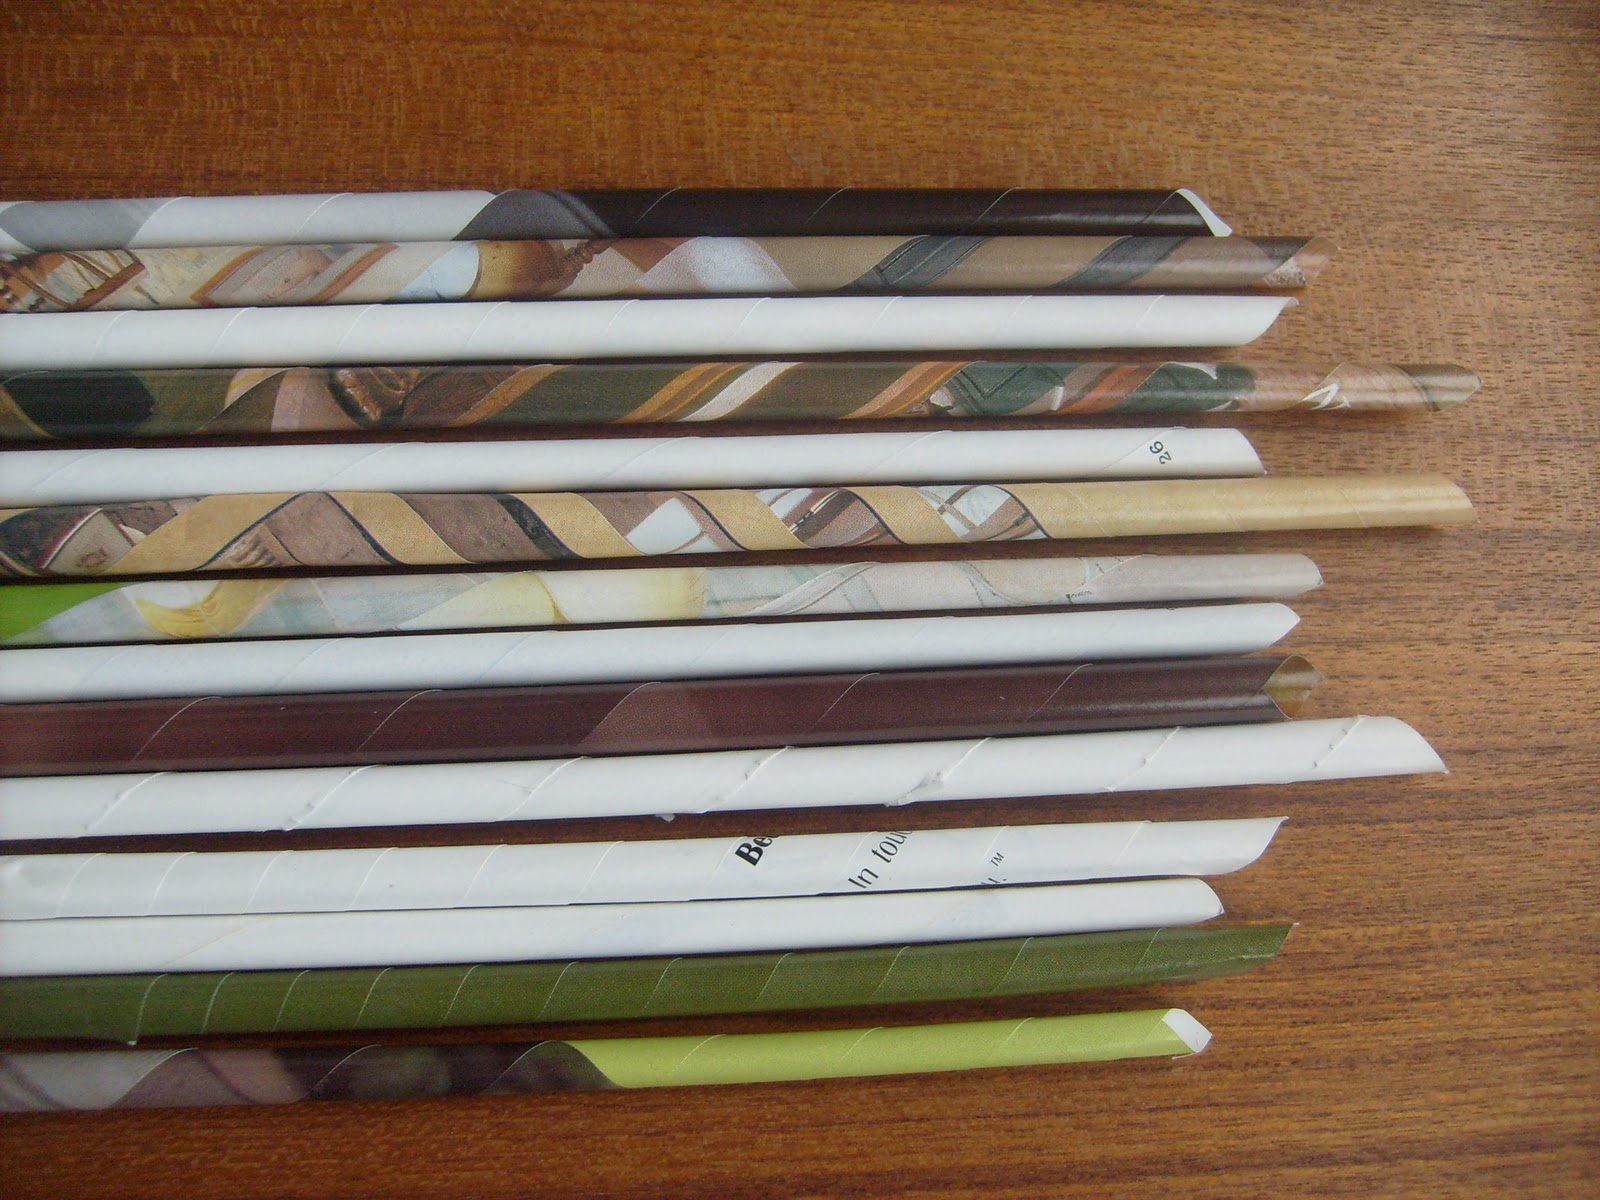


Assembling the Basic Shape:

Cut into each paper straw into 4 inch (10cm) pieces (you will be able to get 3 pieces out of each straw). You will need 12 pieces for each shape. Use the instructions and photo sequence here to assemble the basic shape. The one I made turned out approximately 6 inches (15cm) tall and 6 inches wide. I plan to make many more and make a large mobile out of them. 

Tuesday, October 6, 2009

Decorating with Simple Paper Silhouettes


I made these little bird silhouettes today to embellish a battered tin tray, an (extremely) distressed wooden jewelry box, a photo album and a cigar box.

Silhouettes
are a very quick and easy way to dress up almost anything with a flat surface. You don't even need to be able to draw.

How-to:

1. Find (or draw your own) a silhouette template. Resize it to fit the object you are decorating.

2. Print off the template. Tape it to a window and layer the paper for the finished cut-out on top (wrong side out). Trace the outline.

3. Cut out the silhouette. You may need to use a craft knife for intricate details. Simple shapes can be cut entirely with scissors.

4. Use stick glue or spray adhesive to glue the silhouette to the object.


Sources for free silhouette templates:

freeclipartnow
fundraw (this is where I found the bird I used)
clikr
fun-with-pictures

Silhouette Designs for Artists and Craftspeople

Friday, September 25, 2009

Cardboard Furniture

Photo by Neil Cummings via flickr. cc license.

Photo by Leonardo Bonanni via flickr. cc license.

Photo (and chair) by Nick Michelin via flickr. cc license.

Photo (and furniture) by Nathan Choe via flickr. cc license.

Photo by pablocomotion via flickr. cc license.

Photo by sveeta via flickr. cc license.

Photo by Dan Zen via flickr. cc license.

Cardboard Furniture Inspiration From:

Cartonnistes*
Ecoble
Momelo
Le Blog de Manola
Barab
Cartonnage de Peggy

*I got lost clicking links on this site and it wasn't just because I am not French speaking. I could have spent hours and hours. Be sure and visit this one! One linked site in English

Cardboard Furniture How-tos and tutorials:
Cat Chaise Lounge
Design Cardboard Furniture
Technique From Leo Kempf
Kid's Furniture From Foldschool

Wednesday, September 9, 2009

Thrift Decorating: Abbey and Phil Hendrickson

Bundt cake pan collection on walls of kitchen.
Also in the kitchen, a table (painted red) snatched from the neighbor's curbside trash.

Pencil collection (glued to MDF) wall display.

Vintage clipboard collection and art display on picture rail in dining room.

The nursery (even this room has a book shelf).


Old map as window shade in baby's room.

Necklace collection in the master bedroom.

All photos this post are by Abbey Hendrickson via flickr. cc license.

Abbey and Phil collect things, lots of things: vintage birds, knitting needles, bread bag tags, Fischer Price toys. They also love books (it appears the only room without at least one book case is the bathroom). This tendency to accumulation could get out of hand and be less charming than cluttered. But, for them, it works. Wonderfully.

Why it works so well:

Collections are tightly edited and grouped together. The Fischer Price Mothers all live in one row on a picture rail. There may be 30 of them, but visually they register as a single unit. The same with the vintage bird collection.

Shelves: Lots of them. Free standing book cases. Hanging shelves (and it doesn't hurt one bit that the house still has the original picture rails).

Lots of things on the walls and lots of empty wall space. This sounds like a contradiction. It isn't. Similar things are hung or propped close together, this allows for lots of empty space around them. Like the shelved collections of objects, the artwork groupings work visually as one cohesive whole, something that wouldn't happen if they are spaced out at regular intervals across the walls.

Other things to love about this house:

Rescued furniture.
Surplussed office furniture.
This mobile.
And books (did I mention all the books?).

Visit Abbey's blog, Etsy Shop, Abbey and Phil's Artwork.