Wednesday, April 11, 2012

Update

I have had several kind people inquire about my extended silences here on my blog.

I am doing just fine, but am very busy and have had to let regular blogging go. I will be leaving this blog up and will still post occasionally, but I don't expect to return to blogging regularly.  

Regarding Nuno Magazine:

After much thought, we have decided to put future issues of Nuno on hold indefinitely. Rachel and I are just not able to devote the enormous amount of time necessary to putting together new issues.

The Nuno blog will remain up as a reference and back issues will still be available for purchase at least through the end of the summer.

We greatly appreciate all the support that you, the blogging community, have given us. Many of you left us lovely comments of encouragement, bought each new copy as it came out and used your own blogging space to spread the word about Nuno. Thank you!

Wednesday, January 18, 2012

Love Food Hate Waste


For the last year or so, I've really been trying to waste less food. In the US, the average household throws out a pound and a half of food every day (or in a year, almost $600 worth).  I'd like to think that my household never reached that level of waste, but I'm not so sure.

Since I've become more conscious of waste, I have seen the amount of food I end up throwing away go down drastically. Here are some things I did which worked for me:


1. I buy less perishable food to begin with and keep my refrigerator about half empty. I can easily see what I have and use it up before it spoils. Is it nice to have 3 kinds of lettuce, 6 fruit choices and 5 kinds of cheese? Sure, but if I'm realistic, I know that much of that is going to go bad before it gets eaten. Instead of having a lot of choices simultaneously, I just vary what I buy from week to week.

2. I shop several times a week instead of once a week (but buy much less each time). This works if you go past a grocery store frequently as part of your regular routine. It's not such a good strategy if you have to make an extra trip into town. Really organized people can accomplish the same thing by careful meal planning. That's not realistic for me, but buying (only what I  actually need in the next few days) spontaneously does seem to work in much the same way.

3. I cook smaller portions (and we eat everything up). If we are honest with ourselves, most of us could stand to eat a bit less of even the most healthy foods. Cooking just enough eliminates the very real possibility of leftovers rotting away in the back of the refrigerator. Some people love left-overs and actually eat them, but if you don't, consider cutting down on what you cook up in the first place.  

What good does it do to cut down on food waste?

It's good for the environment: Food takes an enormous amount of energy and water to produce, process and transport. Wasted food is wasted water, wasted fossil fuels, and needless pollution.

It saves you a lot of money: Imagine if every household in the US saved $600 a year on food and turned around and donated  that amount to their local food bank or to programs promoting food security in impoverished countries. Yes, shipping loads of food over to starving nations has never produced a lasting solution, but there are many organizations working to promote real food security based on a more complex strategy. And, while some people would argue that therapeutic food to save the life of a starving child doesn't accomplish anything in the long run, I'm not one of them. Every life matters.

I watched this very interesting documentary on food waste a few days ago. If you have Netflix streaming, you can find the full version there.


Read more:
Love Food Hate Waste Top Tips
Love Food Hate Waste Campaign
Dive! (the film)
The US Wastes Half its Food

Charities Promoting Food Security and Providing Emergency Food Assistance:
Your Local Food Bank
ADRA (this is the program I personally support)

Friday, November 18, 2011

Handmade Holidays: Softies to Sew


Softie toys are great personalized gifts to make for your youngest friends and family members. Handmade softies are also very green and inexpensive to make, since you can use fabric from your scrap bin. Here's a few of my favorite free patterns and tutorials from around the blogosphere.


Oopsie the Octopus
Pointy Kitty
Scrappy Owl
Lucy Goosey
Mooshy Belly Bunny
Plush Duck
Mermaiden
Felt Goldfish
Puppy Plush
Matryoshka Doll
Hedgehog
Softie Whale 
Sheep Softie

Tuesday, November 8, 2011

Handmade Holidays: Crocheted Hats for Men and Boys


I'm kicking off my Handmade Holidays with a roundup of my favorite free crochet patterns. Handmade gifts for men and boys are a tricky proposition, but if you crochet or knit, hats may be your best bet.

Most of these patterns are easy enough for beginners and many could be whipped up in an afternoon.

Which patterns would I like to try? The fisherman's style hat for my father, the beanie with horizontal stripes for my nephews and the "Best Guy Hat Ever,"  for my husband.

Simple Beanie in Single Crochet Stitch
Classic Fisherman's Style Hat
Cap with Vertical Stripes
Best Guy Hat Ever
Large Beanie (with video)
Beanie in Double Crochet Stitch
Visor Cap
Mustache and Beard Hat
Beanie with Horizontal Stripes

Friday, September 9, 2011

16 Things to Make With Cereal Boxes


After doing a number of projects utilizing cereal boxes (mostly masks) I am totally sold on the potential of the lowly paperboard box. Below are some interesting ideas I found from around the blogosphere.

Kid Stuff:

Grown-up Projects:

More Inspiration:
From Plum Pudding
Chris Kassman

Tuesday, August 30, 2011

Seven Compelling Reasons to Thrift


Reason No. One: Thrifting is very environmentally friendly.

Buying a preowned item saves all the energy consumption and pollution caused by producing that item new all over again. How much energy does thrifting really save? Buy a used t-shirt instead of a brand new one and you just saved the planet at least 570 gallons of water and 11 gallons of fuel (plus eliminating emissions, potentially polluting industrial by products, and the energy used to transport the finished t-shirt to the store).

Reason No. Two: Thrifting supports good causes. 

The vast majority of thrift stores are operated by organizations who use most of the proceeds from sales to support charitable work. If you aren't sure what the charities who run your locale thrift shops do with their money, find out and support the shops whose work is most consist with your own personal values.   

Reason No. Three: Thrifting will save you money (lots of it).

The average American woman spends over $600 a year on clothing. Not all your clothing needs can be meet by thrifting, but a regular thrifter will find it challenging to spend $600 on clothes and still be able to get her closet door shut. Other good places to use thrifting to trim your household budget: books and toys, furniture and household items like dishes.
       
Reason No. Four: Thrifting makes your stuff unique (and nicer).

I have a much nicer wardrobe than I would if I didn't thrift: cashmere sweaters, Italian leather shoes, nice vintage jewelry. Ditto for my library, knick-knacks and furniture. If you thrift regularly and develop a good eye, it's absolutely amazing the things that you can find.

Reason No. Five: Thrifting encourages creativity. 

Thrift long enough and you will start looking at objects as things with potential. That battered desk? With a new coat of paint, it could be a sideboard. That ripped silk robe? Cut it apart and it could become a set of cushion covers.  Add refashioning clothing to your repertoire of skills and the possibilities really open up. 

Reason No. Six: Thrifting makes you a more discriminating consumer (hopefully).

Newbie thrifters tend to over buy. "Everything is so cheap!" they say. Unless you are on a very tight budget, if you want something at a thrift store you can buy it. The question, "Can I afford it?" becomes irrelevant. Instead, you have to ask yourself, "Do I have a genuine need for this?" or in the case of non-utilitarian items, "Will this be a lasting source of pleasure?"  Asking these question over and over while thrifting starts to spill over into other areas of your life that relate to the acquisition of "stuff" and results in a more thoughtful and considered way of deciding to accept or reject a new possession.        

Reason No. Seven: Thrifting creates a connection between you and the past.

New, shiny, untouched things with the plastic wrapper still on are rarely found at thrift stores. Instead thrifting involves sorting through objects of various ages and conditions that came from the homes of literally thousands of previous owners. Each object has a story (most of which you will never know). Incorporating items from previous eras into your home and wardrobe gives it a certain rootedness and authenticity that a house full of brand-new objects just can't duplicate.   

Thursday, August 18, 2011

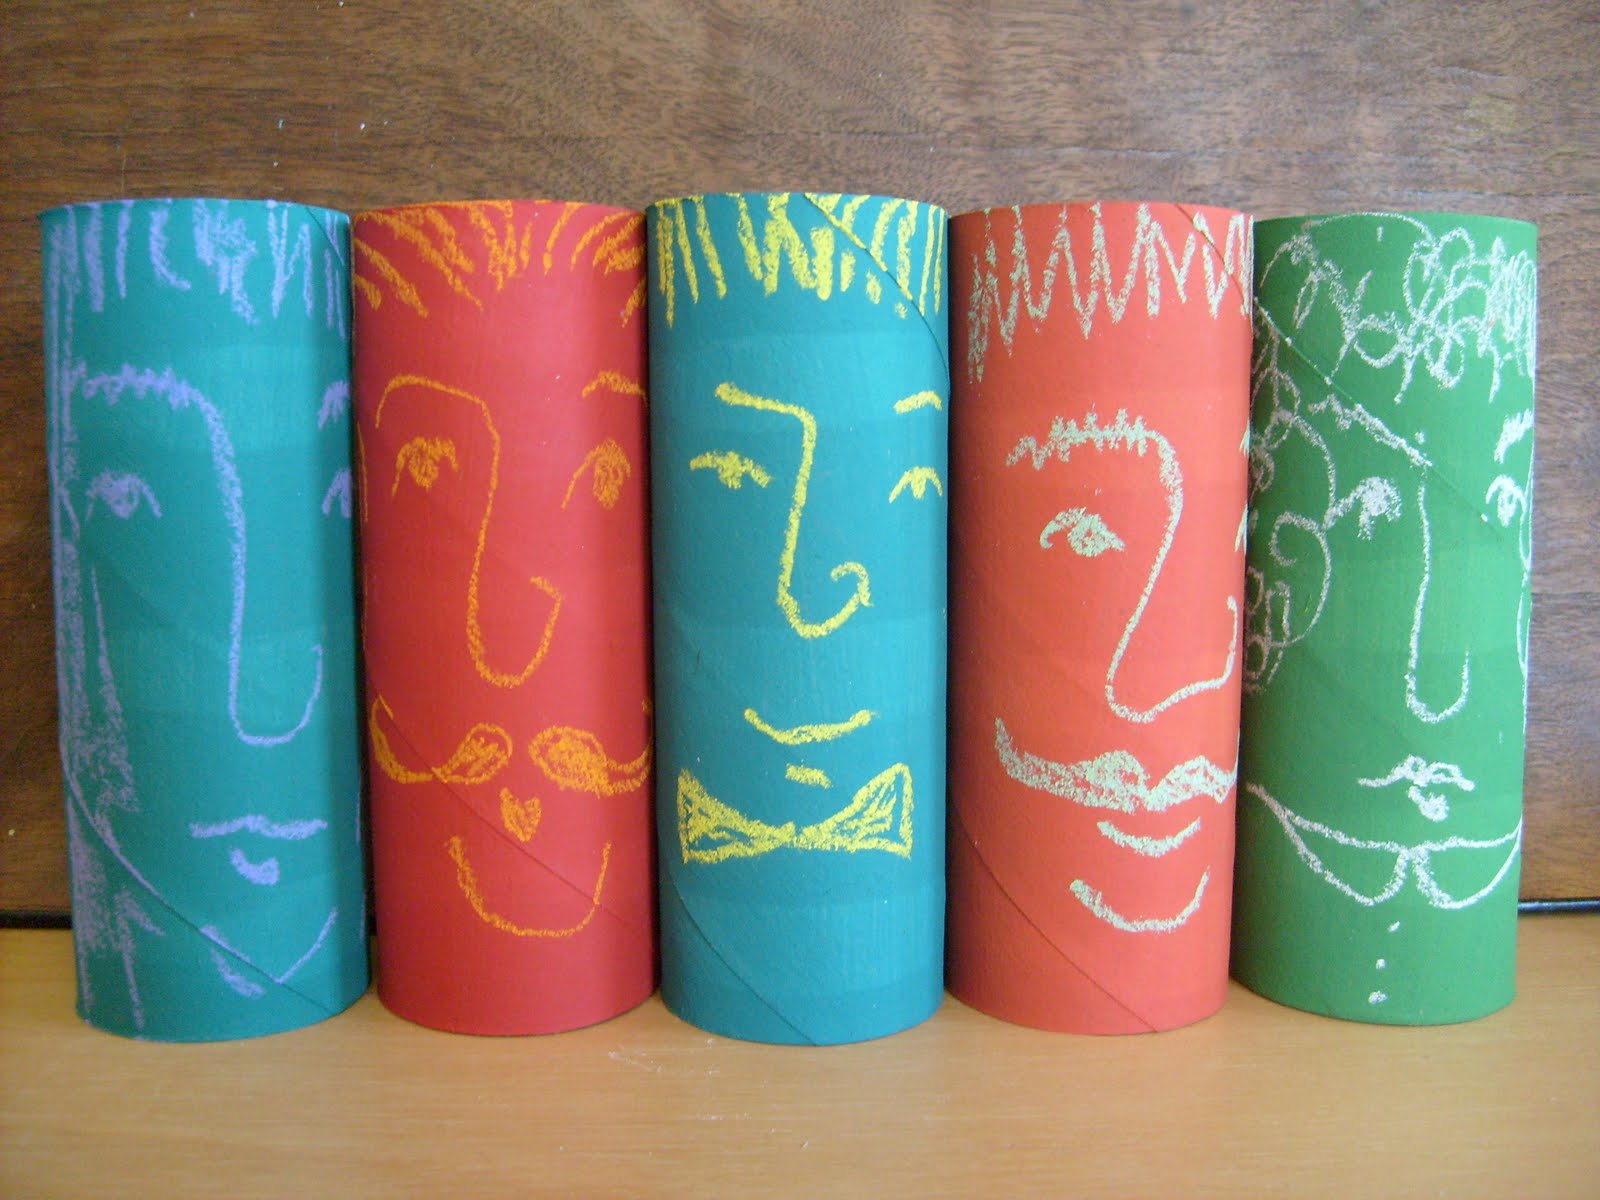
Painted Toilet Paper Tube Chalk Portraits


This is a very simple project you could do with kids (or for yourself). There's not much to it, really. Paint toilet paper tubes with acrylic paint and draw faces on with chalk. If you want to preserve the faces, use a spray fixative, but part of the beauty of this project is that the chalk can be wiped off with a damp cloth and you can draw new faces. If you are doing a project with small children, be sure to use non-toxic paints and chalks and skip the fixative. 

Wednesday, August 17, 2011

Tutorial: Toilet Tube Pillow Box


Pillow boxes made from toilet paper roll tubes is an idea that's been floating around out there for a while (here, here and here), but it's such a good idea---so simple, so easy and so useful---that I'm revisiting it. 

How-to:
 #1: Flatten a toilet tube. I used a heavy book to press mine flat on the table top. It will still puff up a bit. That's o.k. Use a bone folder or the edge of a ruler to make the side folds crisp.
 
#2: Trace around the rim of a drinking glass (mine was 3.5"/8.5cm across) at each end of the tube. Use the point of bone folder (or the "eye" end of a heavy needle) rather than a pen or pencil.

#3: Trim on the line you traced in step #2.

#4: Create fold line on both ends by tracing around the rim of the glass as shown (again, use the tip of the bone folder, rather than a pen or pencil). Flip the tube over and do the other side.

#5: Fold in the ends. You can secure the ends with tape, glue or stickers.  Or you can use a string or ribbon tie.

PS: I took these plain boxes and painted them with a Native American inspired design. See them over at Nuno. 

Friday, August 12, 2011

Monday, August 1, 2011

Things to Make With Seashells


Wondering what to do with all those shells that keep coming home with you from trips to the beach? Here are a few tutorials for simple things to make and more links to some truly beautiful (and a few bizarre) things made from seashells.

Tutorials:
Seashell Wreath
Seashell Mobile
Seashell Candle
Seashell Nightlight
Seashell Printed Fabric
Seashell Garland
Seashell Soap Dish
Seashell Necklace
Seashell Chandelier

Inspiration:
Everything Seashell
Antique Seashell Jewelry
This Little Collection
Painted Fragment
Grottoes and Shell Houses

Thursday, July 28, 2011

Tutorial: Macrame Button Ring


I have a little collection of antique buttons so I decided to combine a few of them with macrame to make a little ring. Here's how I did it:  


Cut two pieces of string 14" long. I used #10 bamboo crochet thread. You will also need three shank buttons, one small and two tiny.

Thread one string onto the small button and thread the other onto one of the tiny buttons. Pull through so that the button is at the center of the string.

Thread both tails of the tiny button's string through the hole in the small button.

Choose any tail and thread the remaining tiny button on to it.

When you turn the buttons over, it should look like this.

Check the length as you go along and stop when the buttons and the knotted string are long enough to go all the way around your finger.


Take on of the tails extending from the square knot senet and thread it back through the center button. Pull it tight and knot. Make more knots as needed to make the junction stronger. Clip the tails off and dab the cut ends with clear nail polish. When the nail polish is dry, try the ring on. If the buttons seem a bit "floppy" use a needle and sewing thread through the holes in all of the buttons to draw them closer together and knot securely.   

Wednesday, July 6, 2011

Summer Kid Craft: Ric Rac and Button Bracelet

 
If you sew at all, chances are you have bits of ric rac and odd buttons sticking in your sewing basket that you'd be more than willing to put to good use. This bracelet is a quick and easy project suitable for kids that lends itself to being replicated over and over. Here's how to make a ric rac and button bracelet:
You will need: A needle and thread, 1 inch strip of elastic roughly  twice as wide as your ric rac, two strips of ric rac approx. 8 inches long (smaller kid's wrists can use less) and a large button.

 Twist the ric rac together so it looks like this.

 Sew one end of the ric rac to the strip of elastic. Check to make sure that the bracelet is going to fit. Trim off some ric rac if it seems too big. Sew the other end of the ric rac to the elastic. Sew the button to the middle of the elastic to cover it up. 

Wednesday, June 29, 2011

Tutorial: Thread Wrapped Bangle


A while back, my sister handed down a lovely agate bangle to me that had a crack in it. Although this project could be made with any sort of bangle, it is an excellent way to revamp a damaged bracelet.

Here's how I did it:


Important Note: Before you start, take a strip of double faced tape and carefully adhere it to the inside of the section of bangle you intend to wrap. This step is not shown in the illustrations, but is necessary to keep the thread from unwinding itself, particularly if the bangle is of a slippery polished material.

Cut a length of thread or string approximately 6 feet long. Tie it tightly around the bangle. Move the knot to the inside. Stretch the tail out flat and stick it to the double faced tape. You will be wrapping over the tail in the next step.
 
 Wrap the thread tightly around the bangle, making sure the wrapping is neat, that the threads lie tightly next to each other, but do not over lap.

 When you have about 6" of string left, thread the tail onto a heavy needle and stitch back through a few threads (on the inside of the bangle). Make a knot.
 
Using the needle, draw the remaining tail under about 1/2 inch of wrapped threads, pull the tail through and clip of the end flush with the wrapped threads.


If the threads still feel loose and in danger of unwrapping, you could spread a light layer of clear drying glue across the wrapped threads on the inside of the bangle. 

Wednesday, June 22, 2011

Tutorial and Pattern: Tea Towel Hat


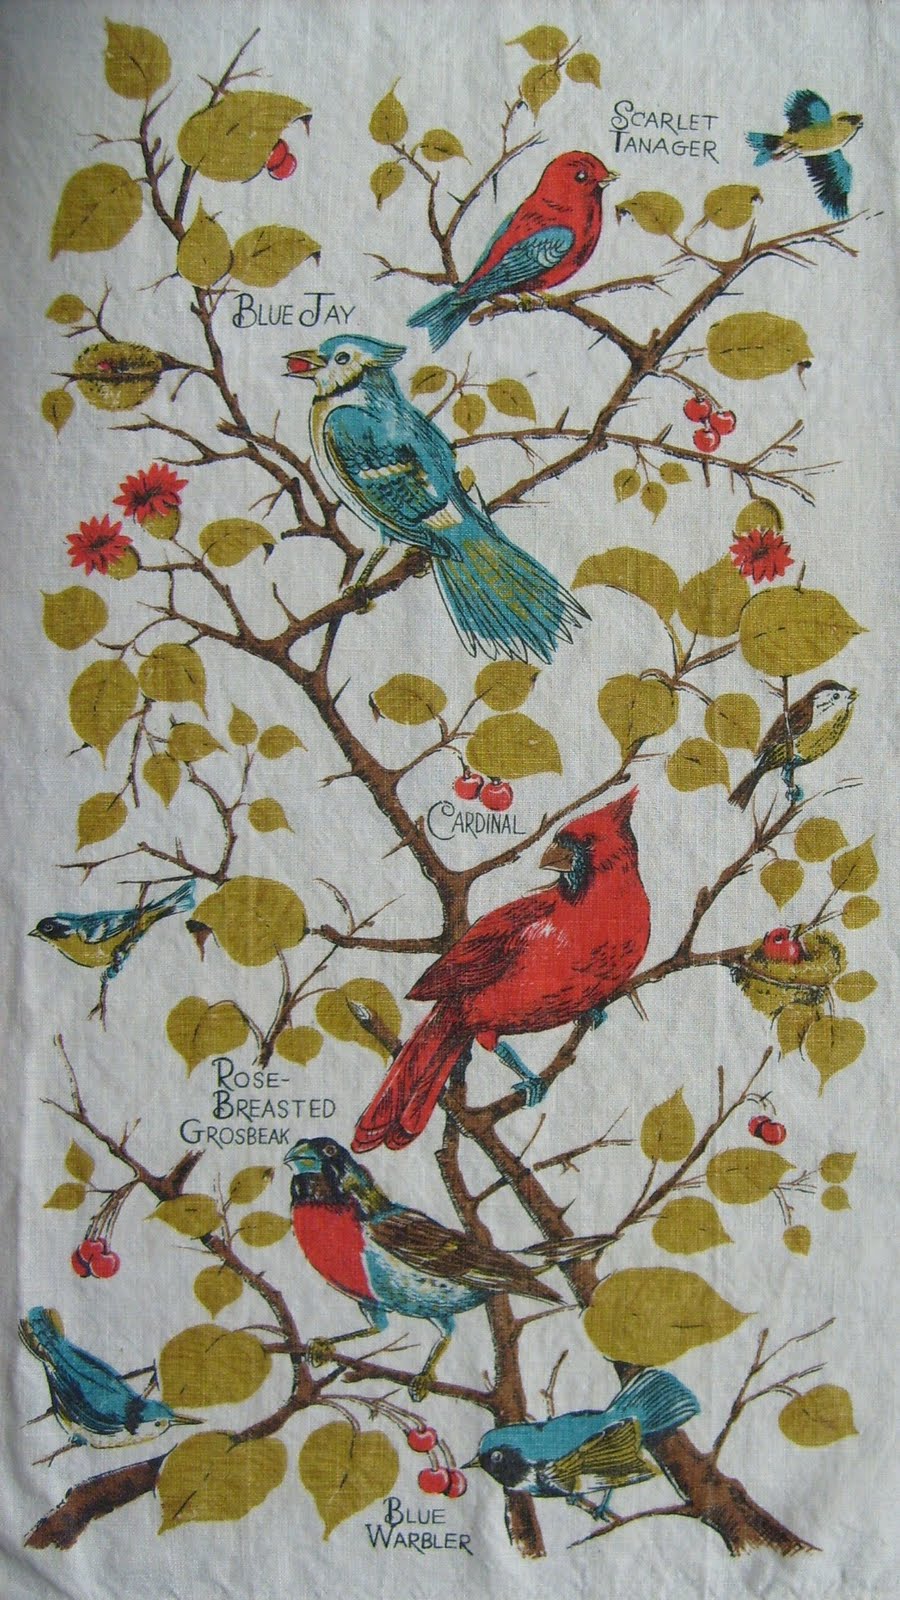
I made a new hat pattern and created this version out of a super cute vintage tea towel with various songbirds on it. Obviously, there is no need to use a tea towel, any old fabric will do, but the pattern does cut out with very little waste from a standard sized tea towel and if you use a medium to heavy weight linen one it has just enough stiffness to make the hat hold it's shape well.

Here's how to make your own:


Cut out the pieces using the pattern embedded at the bottom of this post. Use  a fabric that is a bit lighter weight for the lining. Seam allowance for all seams is the width of the presser foot.


Place the two brim pieces right sides together and sew up the side seams. Place the two crown pieces right sides together and sew up the side seams. Press seams flat and turn. Repeat the process with the lining pieces.


Insert the crown inside the brim as shown in the illustration. Pin and sew together with one continuous seam. Repeat process with lining pieces.


Pin the top of the hat to the crown. Sew together. Repeat with the lining, except leave a 3 inch gap in the seam (be sure to back stitch at beginning and end because you will be turning the whole hat through this opening which will cause the seam to unravel if you don't back stitch). 


Placing the right sides together (lining should be inside out and the hat right side out) fit the hat inside the lining. Pin all the way around the brim. Sew the lining brim to the hat brim with one continuous seam.


Turn the hat right side out through the gap you left in the lining. Stuff the lining inside the hat. Press carefully. If you want, you can top stitch around the brim to give it extra stiffness and to keep the edge neat. I didn't do that, but you may find that the fabric you use needs it.

Tea Towel Hat Pattern